MF-BB with Built-in WiFi Bridge Manual
MF-SP motorised cylinder manual and installation guide:
Original HubSpot URL: https://learn.simpled.uk/updated-manual-of-mf-sp
Special Attention:
1: Please keep mechanical keys outdoors to avoid locking them indoors.
2: Recharge the batteries when you see the low battery alarm.
3: Read this manual carefully before installation and keep it for
future reference.
What’s Included?
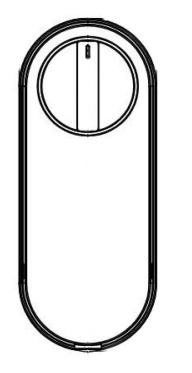
Motorised Cylinder
MF
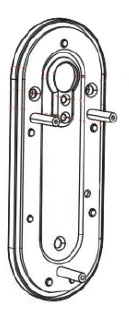
Back Plate and Rubber Gasket
rubber-gasket
Door Sensor
door sensor
Physical keys
1 x Cylinder adapter 50mm
Euro-Cylinder
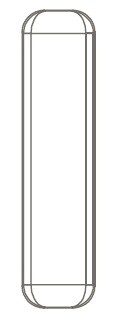
1 x Cylinder Spacer 20mm
Adapter
1 x km5*65mm
Screw-1
1 x KA4*20mm

scew
2 x KM3*10mm Screw
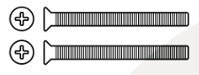
KM3
2 x KM3*18mm Screw
KM3
2 x KM3*30mm Screw
KM3
2 x KM3*40mm Screw
KM3
4 x M5*10mm Screw

M%
5 x M4*20mm Screw
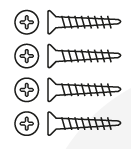
image-png-Jan-09-2025-10-31-31-6907-AM
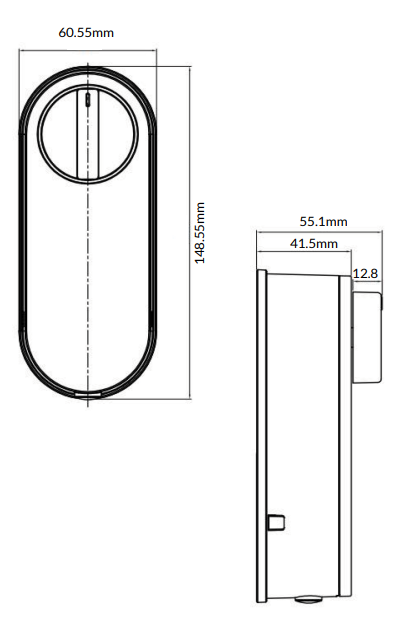
Specifications:
Materials | Aluminum Alloy |
Weight | 1.5 kg |
Default Unlocking Methods | Smartphone Access Apple Watch Key (to be shared remotely) Mechanical key |
Unlocking Methods (Available Only with Wireless Keypad) | Fingerprint Passcode (OTP/Timed/Permanent) Proxy Fobs Phone sticker Contactless Card |
Unlocking Methods (Available Only with WiFi Bridge) | Alexa Google Home Full Remote Management |
Colour | Black |
Doors Applicable | Any types of door with a Euro Cylinder |
Compatible Battery | 2x18650 Button Top Lithium Batteries |
Door Thickness | 32-80 mm |
Working Temperature | -10 to 55°C |
Working Humidity | 0-95% |
Low battery alarm | Less than 6.8V |
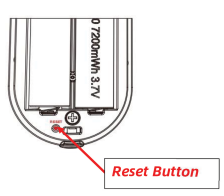
Factory reset:
Long press the reset button on the back of the front panel for about
3 seconds. The reset is successful when the indicator light changes from dark blue to light blue.
Installation:
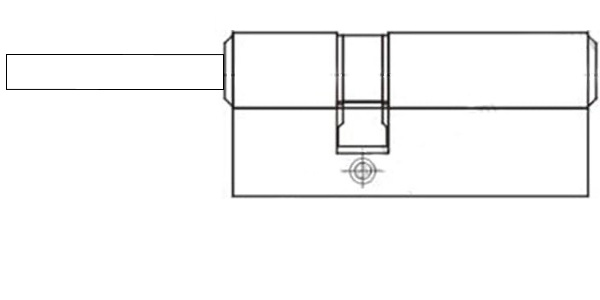
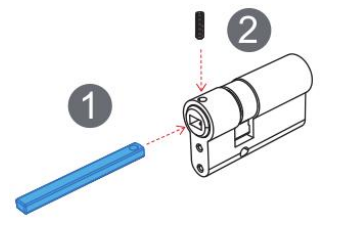
Step 1: Changing the cylinder spindle
Note: Choose the correct cylinder spindle according to the door thickness.
Remove the default screw and cylinder spindle
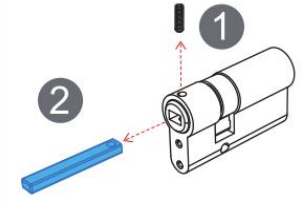
Install the correct screw and cylinder spindle
Door thickness (excluding the panel thickness) | Cylinder spindle length |
32-47mm | 36mm |
48-63mm | 43.5mm |
64-80mm | 51mm |
Others | Cut the 86mm spindle to the desired length |
Step 2: Installing on an old door - Removing the Existing Euro Cylinder
If your door already has a Euro cylinder, remove it by unscrewing the side fixing screw. To assist with removing the cylinder, you might find it useful to insert a key and turn it slightly, while pushing/pulling the cylinder. This will provide a better grip, making it easier to remove the old cylinder out.
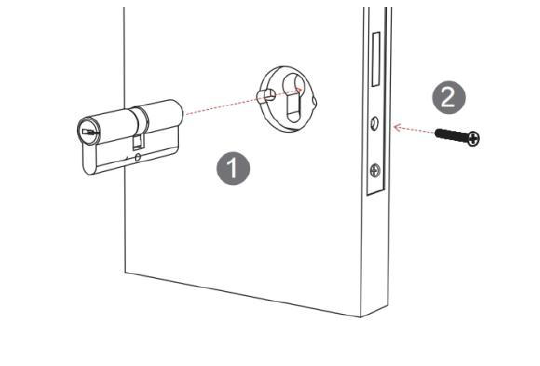
If your door has a pre-installed mortice for a Euro cylinder, skip the step above and proceed with inserting the provided cylinder into the slot. You may need to trim the cylinder tail to match your door’s thickness.
Warning:
Before trimming, ensure you leave 25-35mm of the tail protruding beyond the door level to ensure a proper fit in the motor slot. Remember, your door’s thickness will add to this measurement. Cutting it too short may disengage the manual knob turner, preventing manual operation.
Step 3: Attaching the Rubber Gasket to Back Plate
Place the rubber gasket over the plate to ensure a secure fit and prevent slipping. This also helps protect the door surface and improves stability.

Step 4: Securing the Back Plate
Place the cylinder spacer over the cylinder, then align the plate and secure it using the two screws. Ensure it is firmly attached for a stable fit.
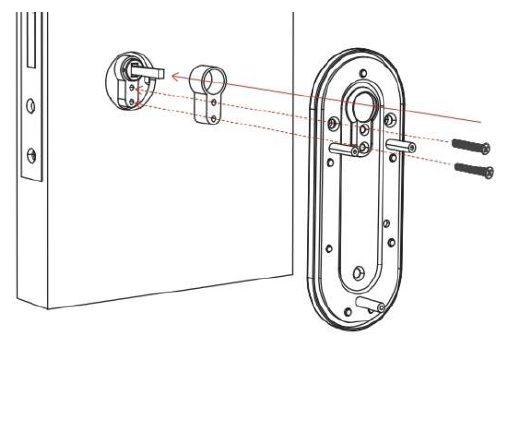
Step 5: Mounting the Back Plate
Place the motor panel onto the plate, ensuring proper alignment, and secure it with the three screws. Tighten firmly for a stable installation.

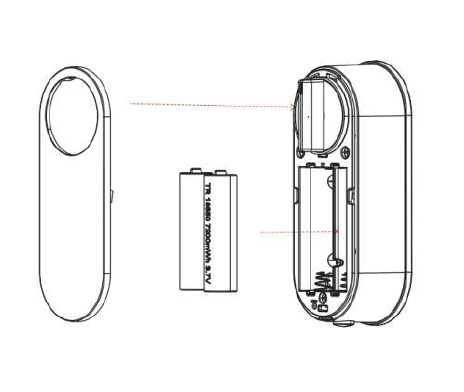
Step 6: Inserting the Batteries
Ensure the batteries are fully charged before inserting them. Once in place, attach the battery cover to complete the installation.
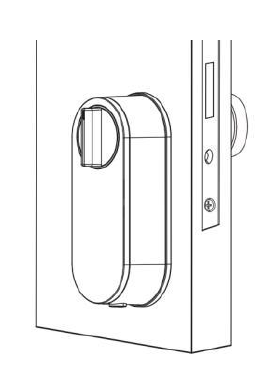
Step 7: Testing mortice operation
Test the manual knob turner to ensure smooth rotation. Then, press the button underneath the lock to check if it locks and unlocks the door smoothly.
Step 8: Adding the door sensors
Adding the door sensors enables the lock to synchronise so that it waits to Auto-Lock (relock) until the door is closed again.
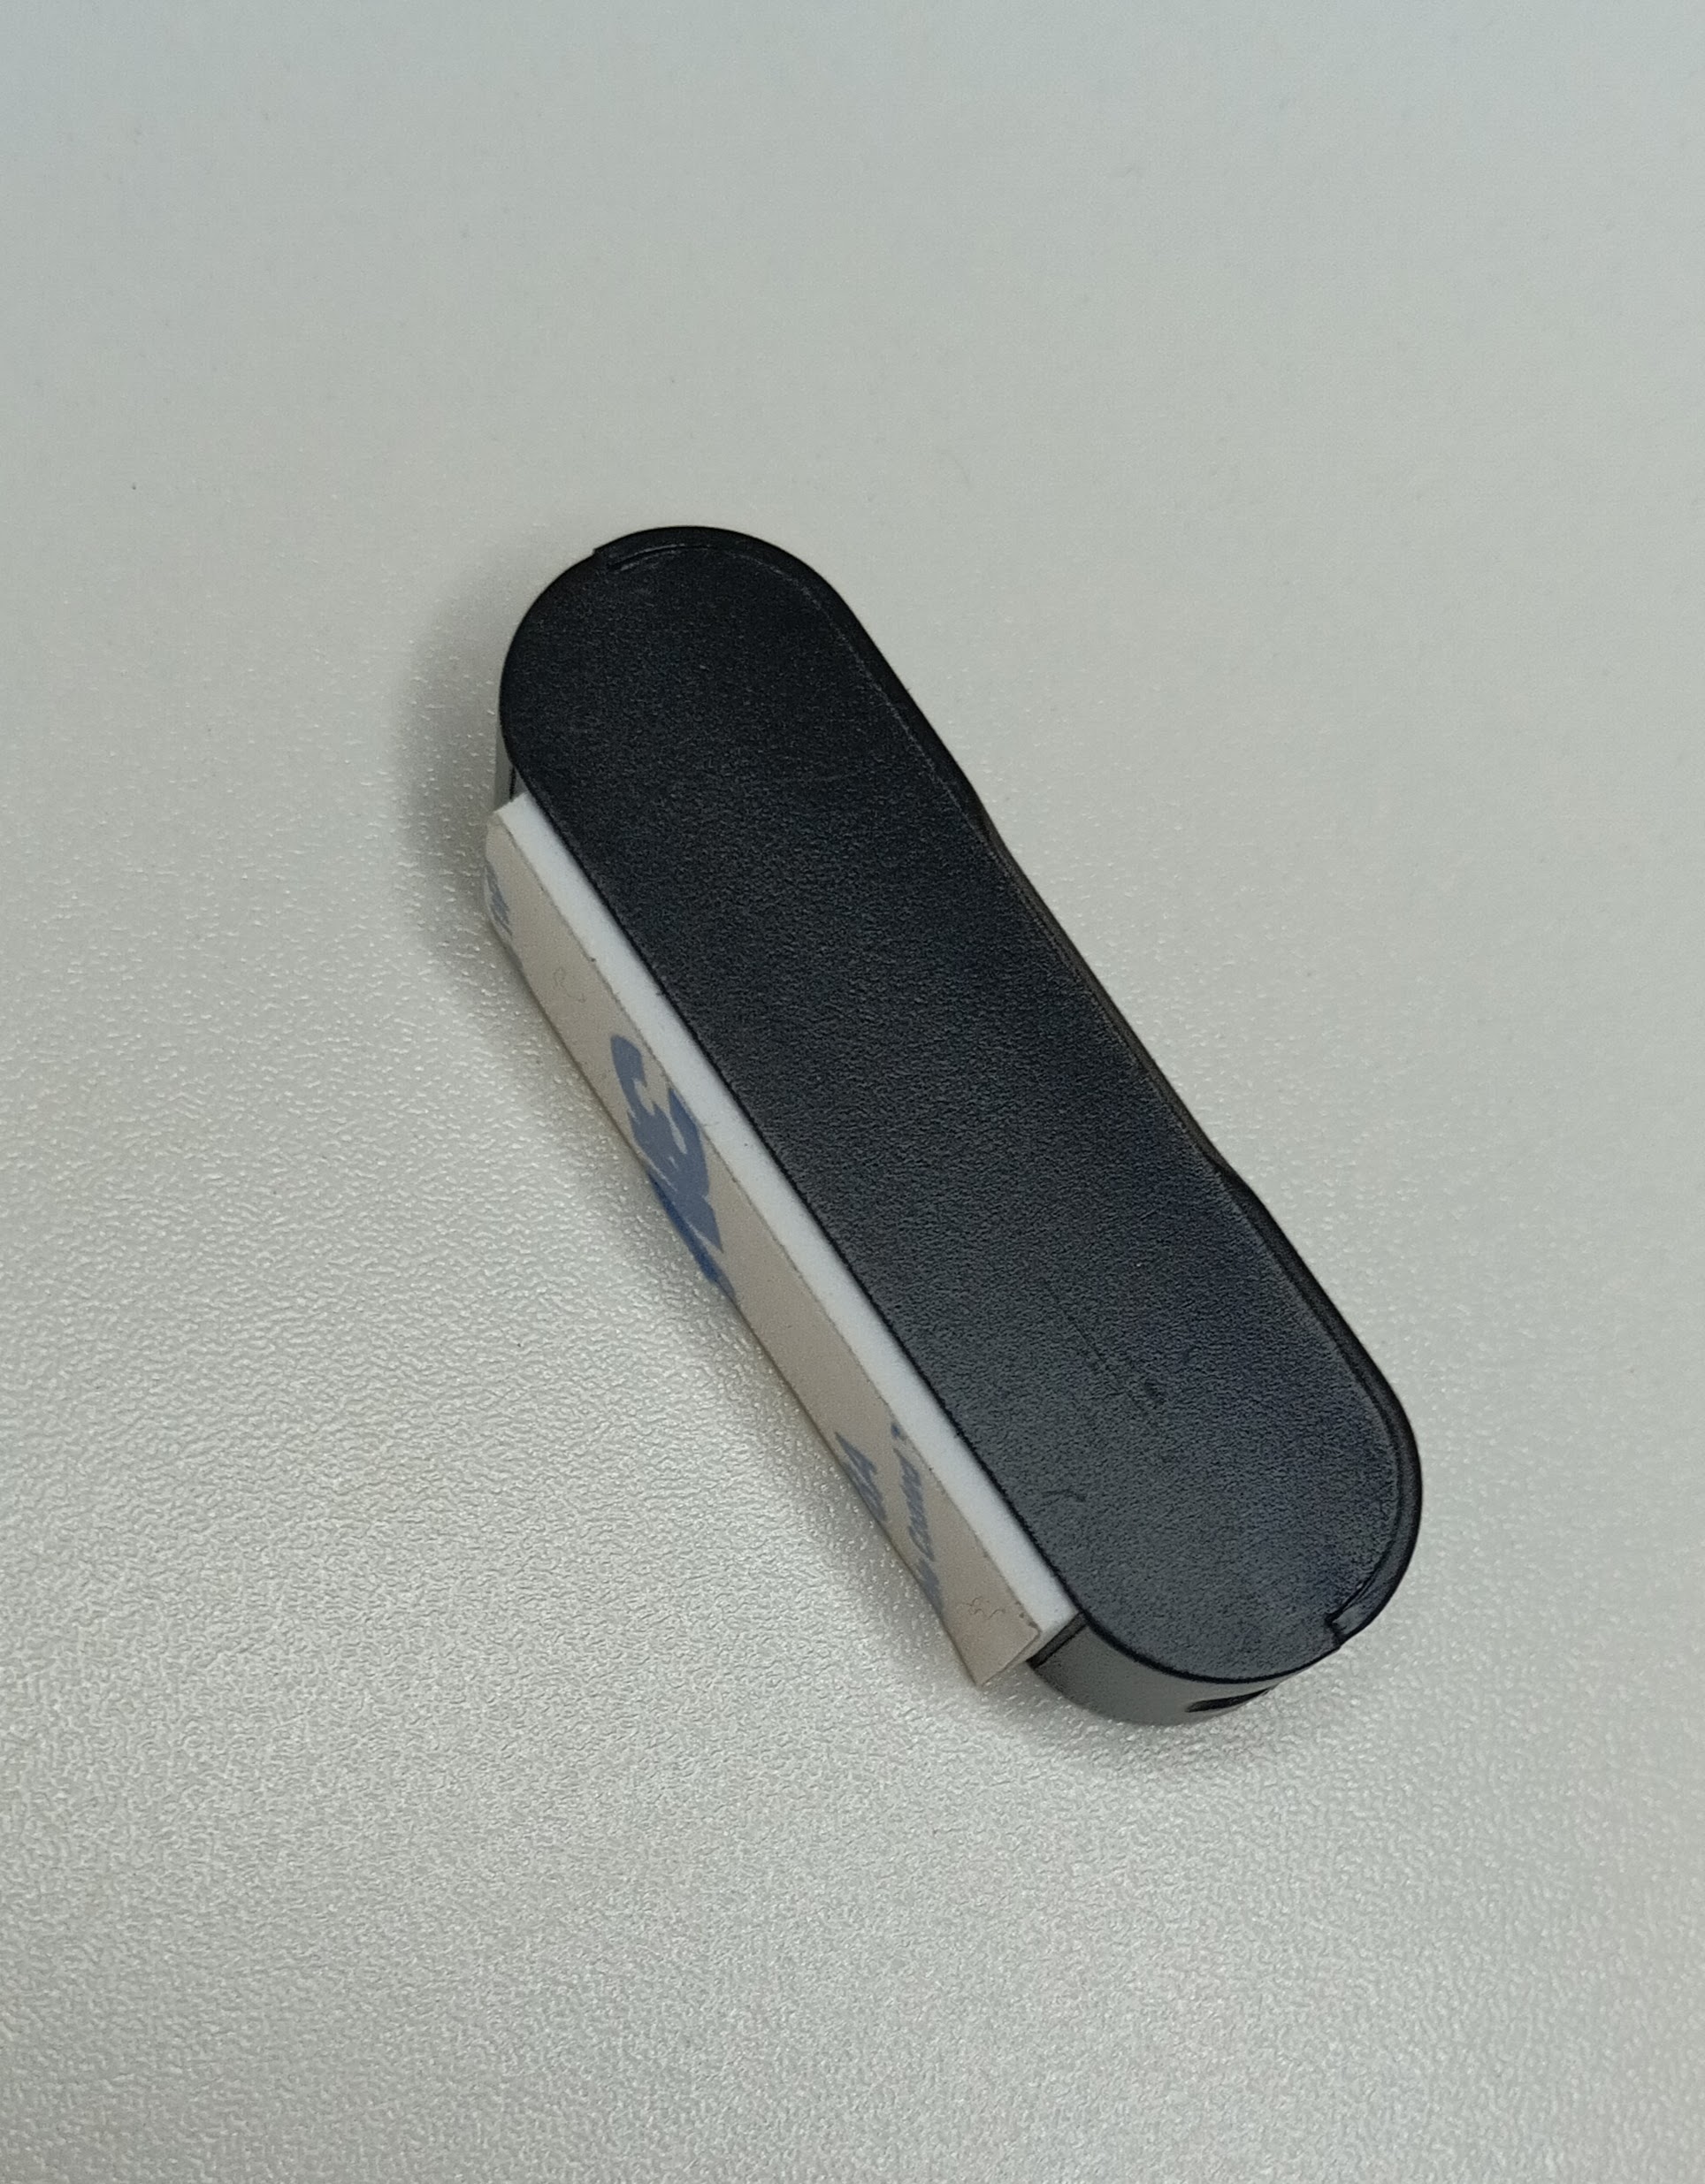
MF-Sensor on its own
Sensor positioning
On the edge of the inside of the door frame
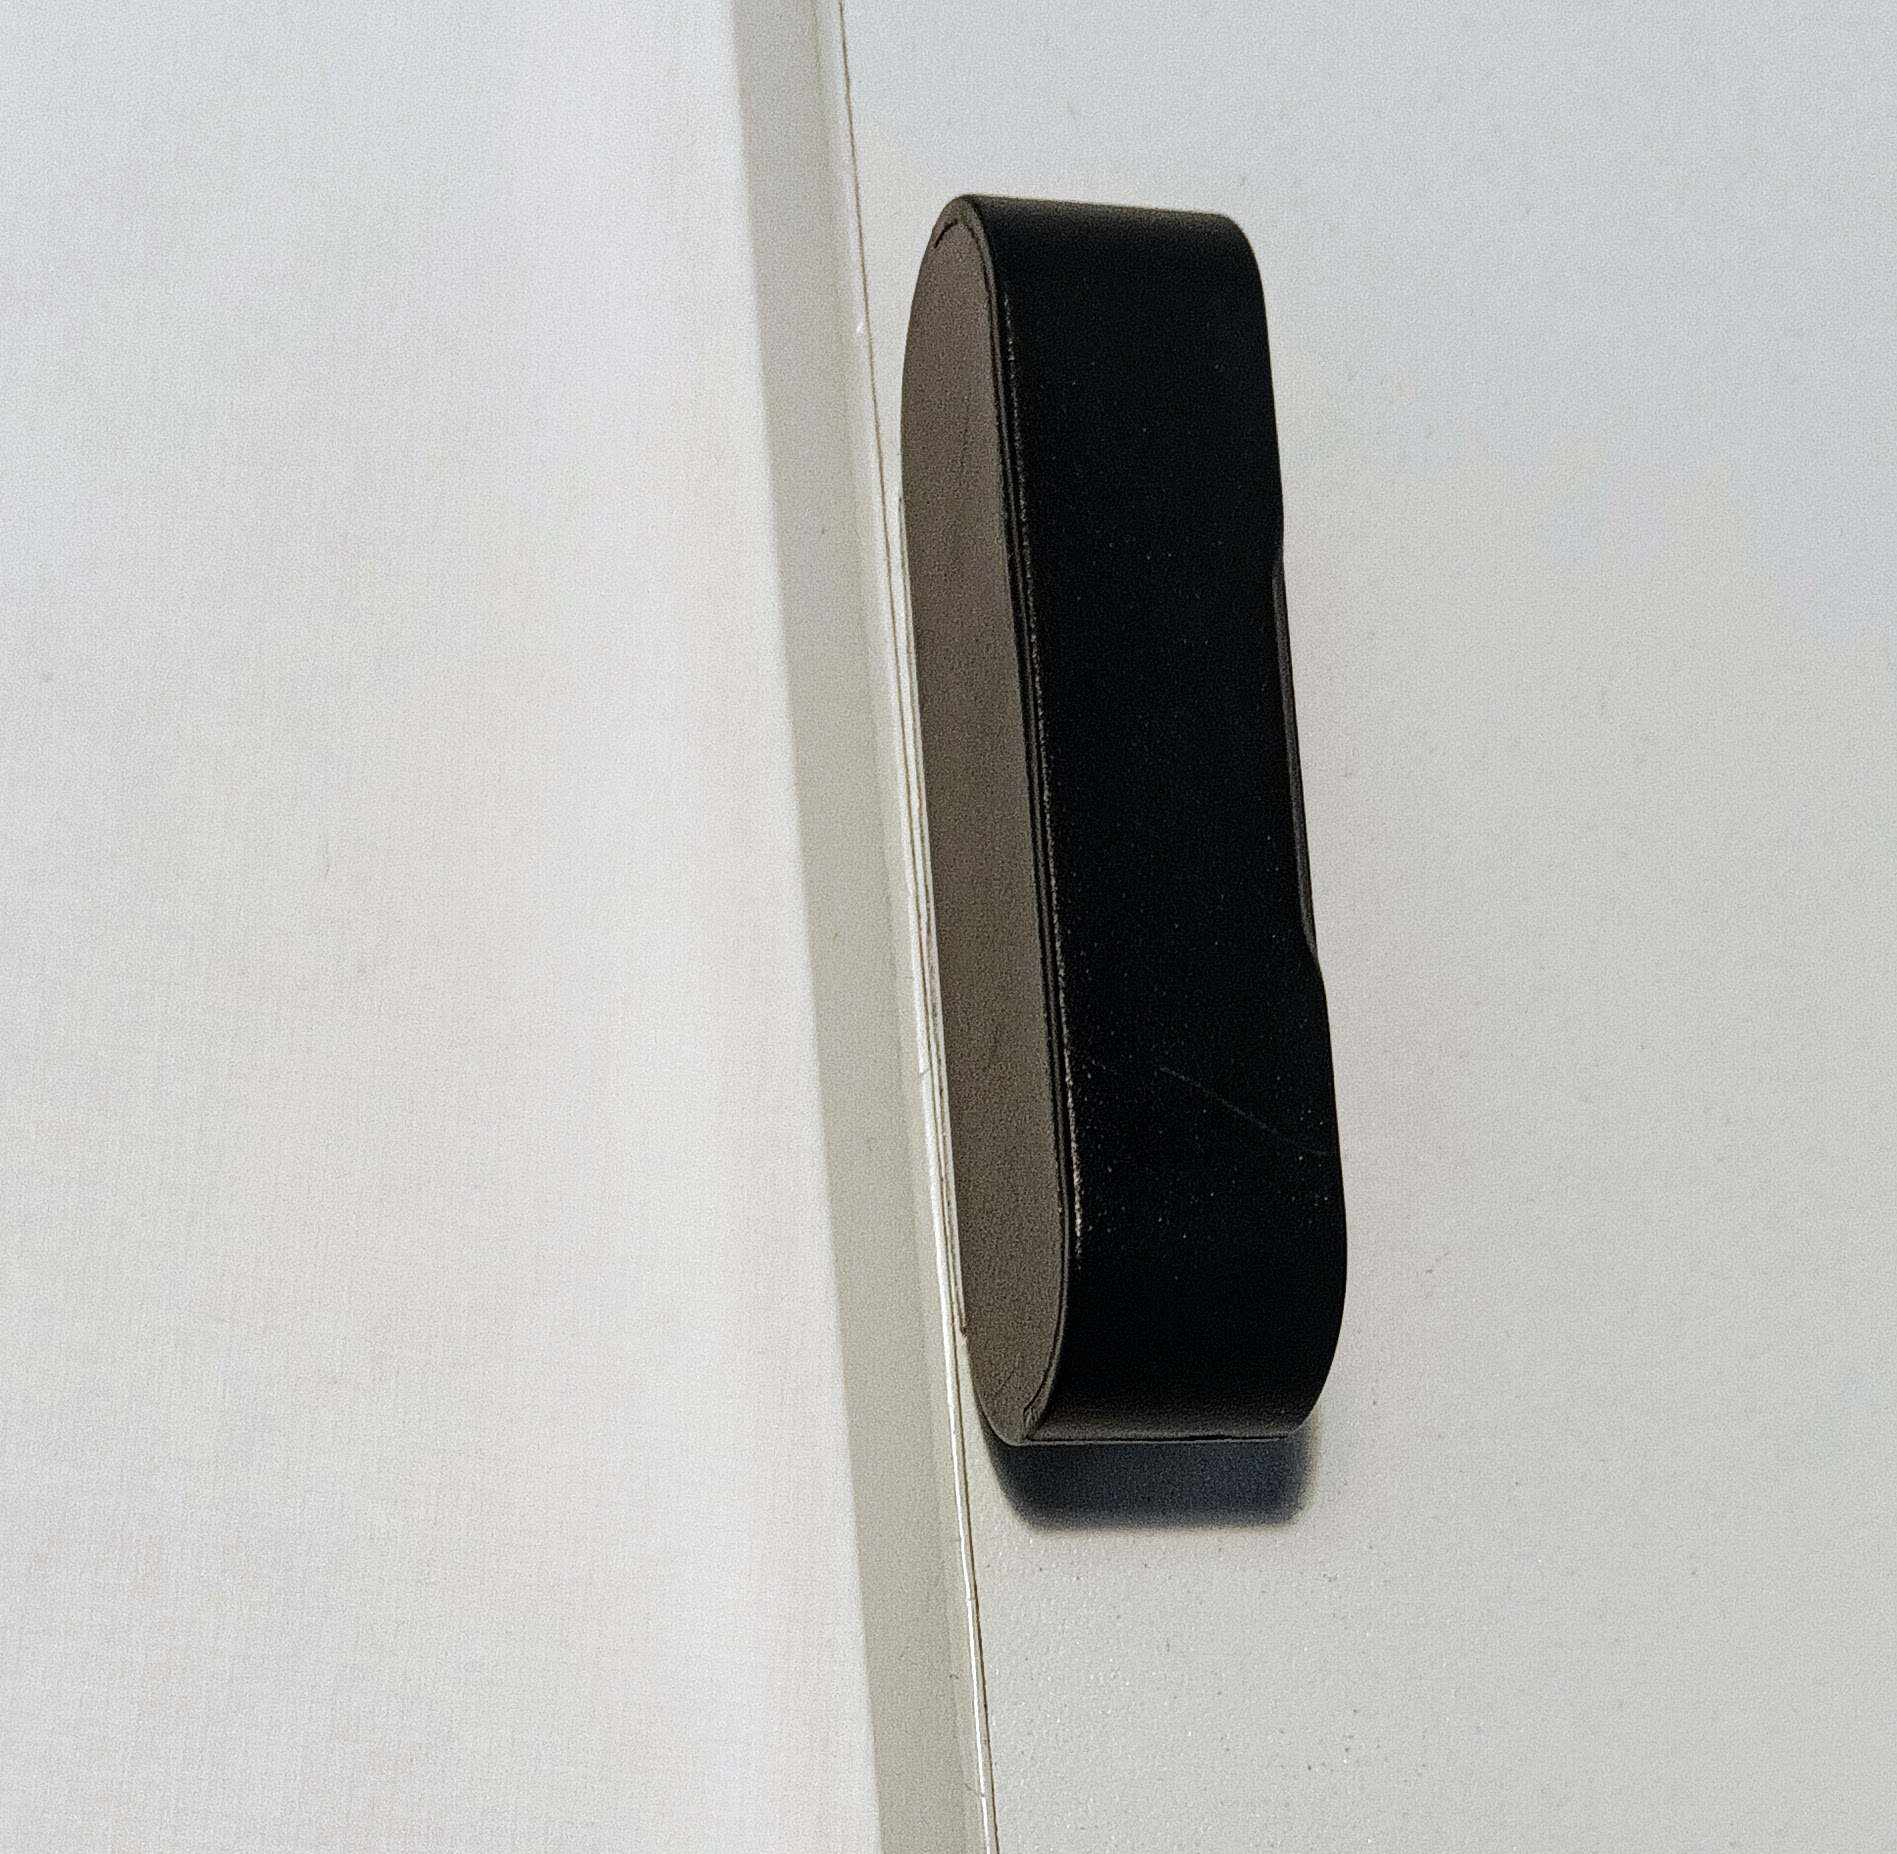
MF-Sensor Position 1
Aligned so the bottom of the sensor is in line with the top of the Simpled logo on the lock

MF-Sensor Position 2
Just peel off the film from the adhesive pad and firmly stick to the edge of the inside of the door frame. When the door shut this will now trigger re-locking.
This sensor is preprogrammed into the lock and does not need to be added as a separated door sensor option in the app.
Congratulations! Your Simpled MF Lock is now installed and ready to use. You can now proceed with pairing it with your phone.
If supplied as part of a bundle you may also have the OA - Fingerprint/Keypad device
OA Weatherproof Fingerprint Accessory
Here is a link the separate installation and linking manual for that item:
https://kb2.simpled.uk/doc/oa-sp-keypad-and-fingerprint-sensor-manual-and-data-spec-DbwNabJjrz
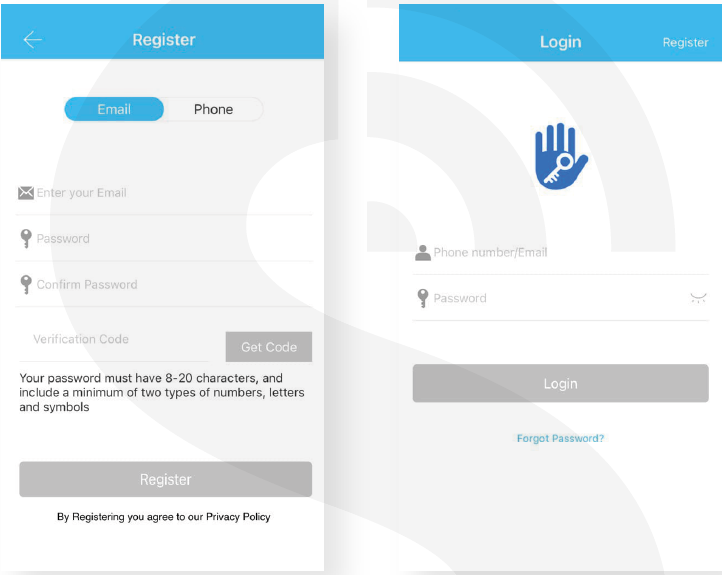
Setting up the Smart App (TTLOCK):

Download the “TTlock App” from the App Store or Google Play by either
Scanning the QR code
Searching the “TTLock” app
Sign up for a TTlock account, and add the smart lock to the device list
Activate the lock’s Bluetooth by touching the Lock’s keypad
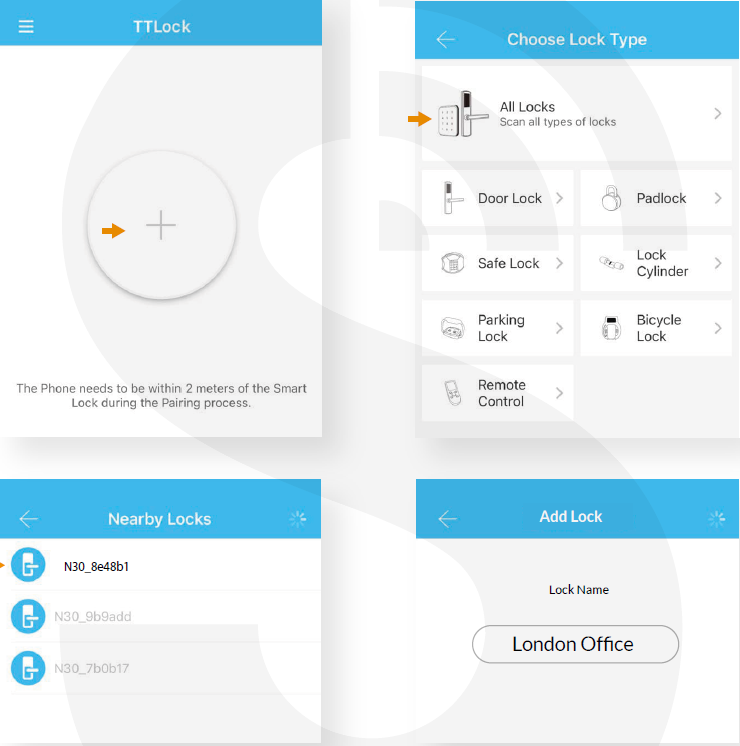
Tap on “+ Add Lock” and select your lock type. Press on “All Locks”
if you are not sure.In the “Nearby Locks” list, select the appeared lock. Please make sure
you are near the lock in the Bluetooth range.Rename the Lock “Sweet Home, Spain Villa, London Office, …”
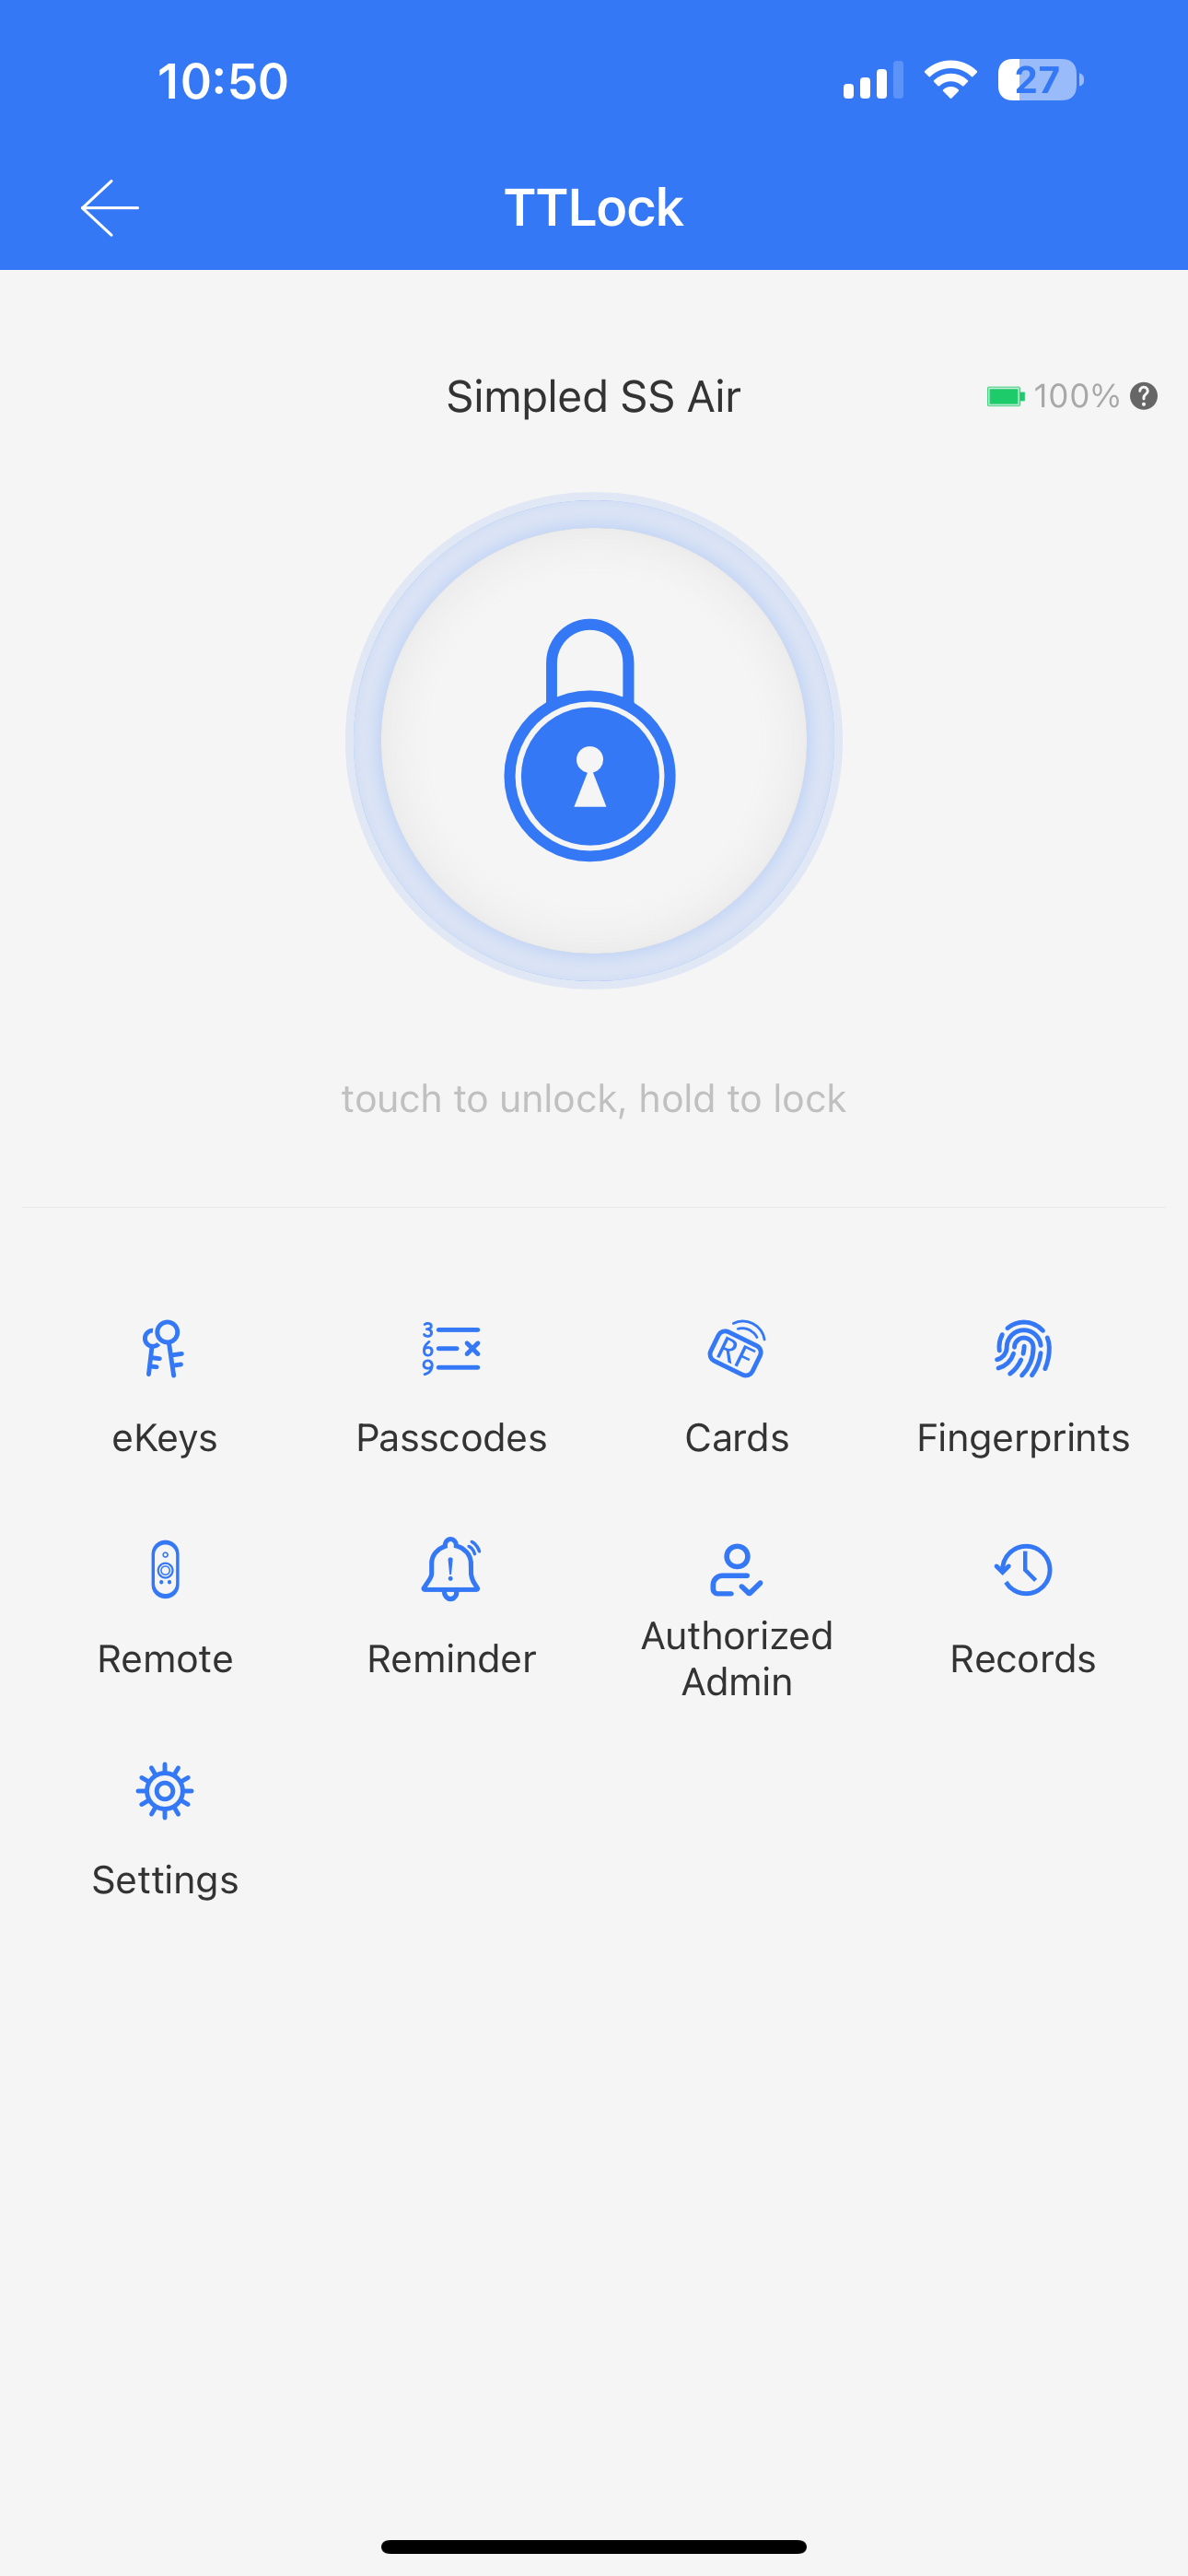
Bluetooth Unlock:
Try to open the lock by tapping on the “Lock Icon”. Please ensure there is
No problem with Bluetooth communication, and the phone is within the
5-meter range of the Simpled Slim Smart Lock.
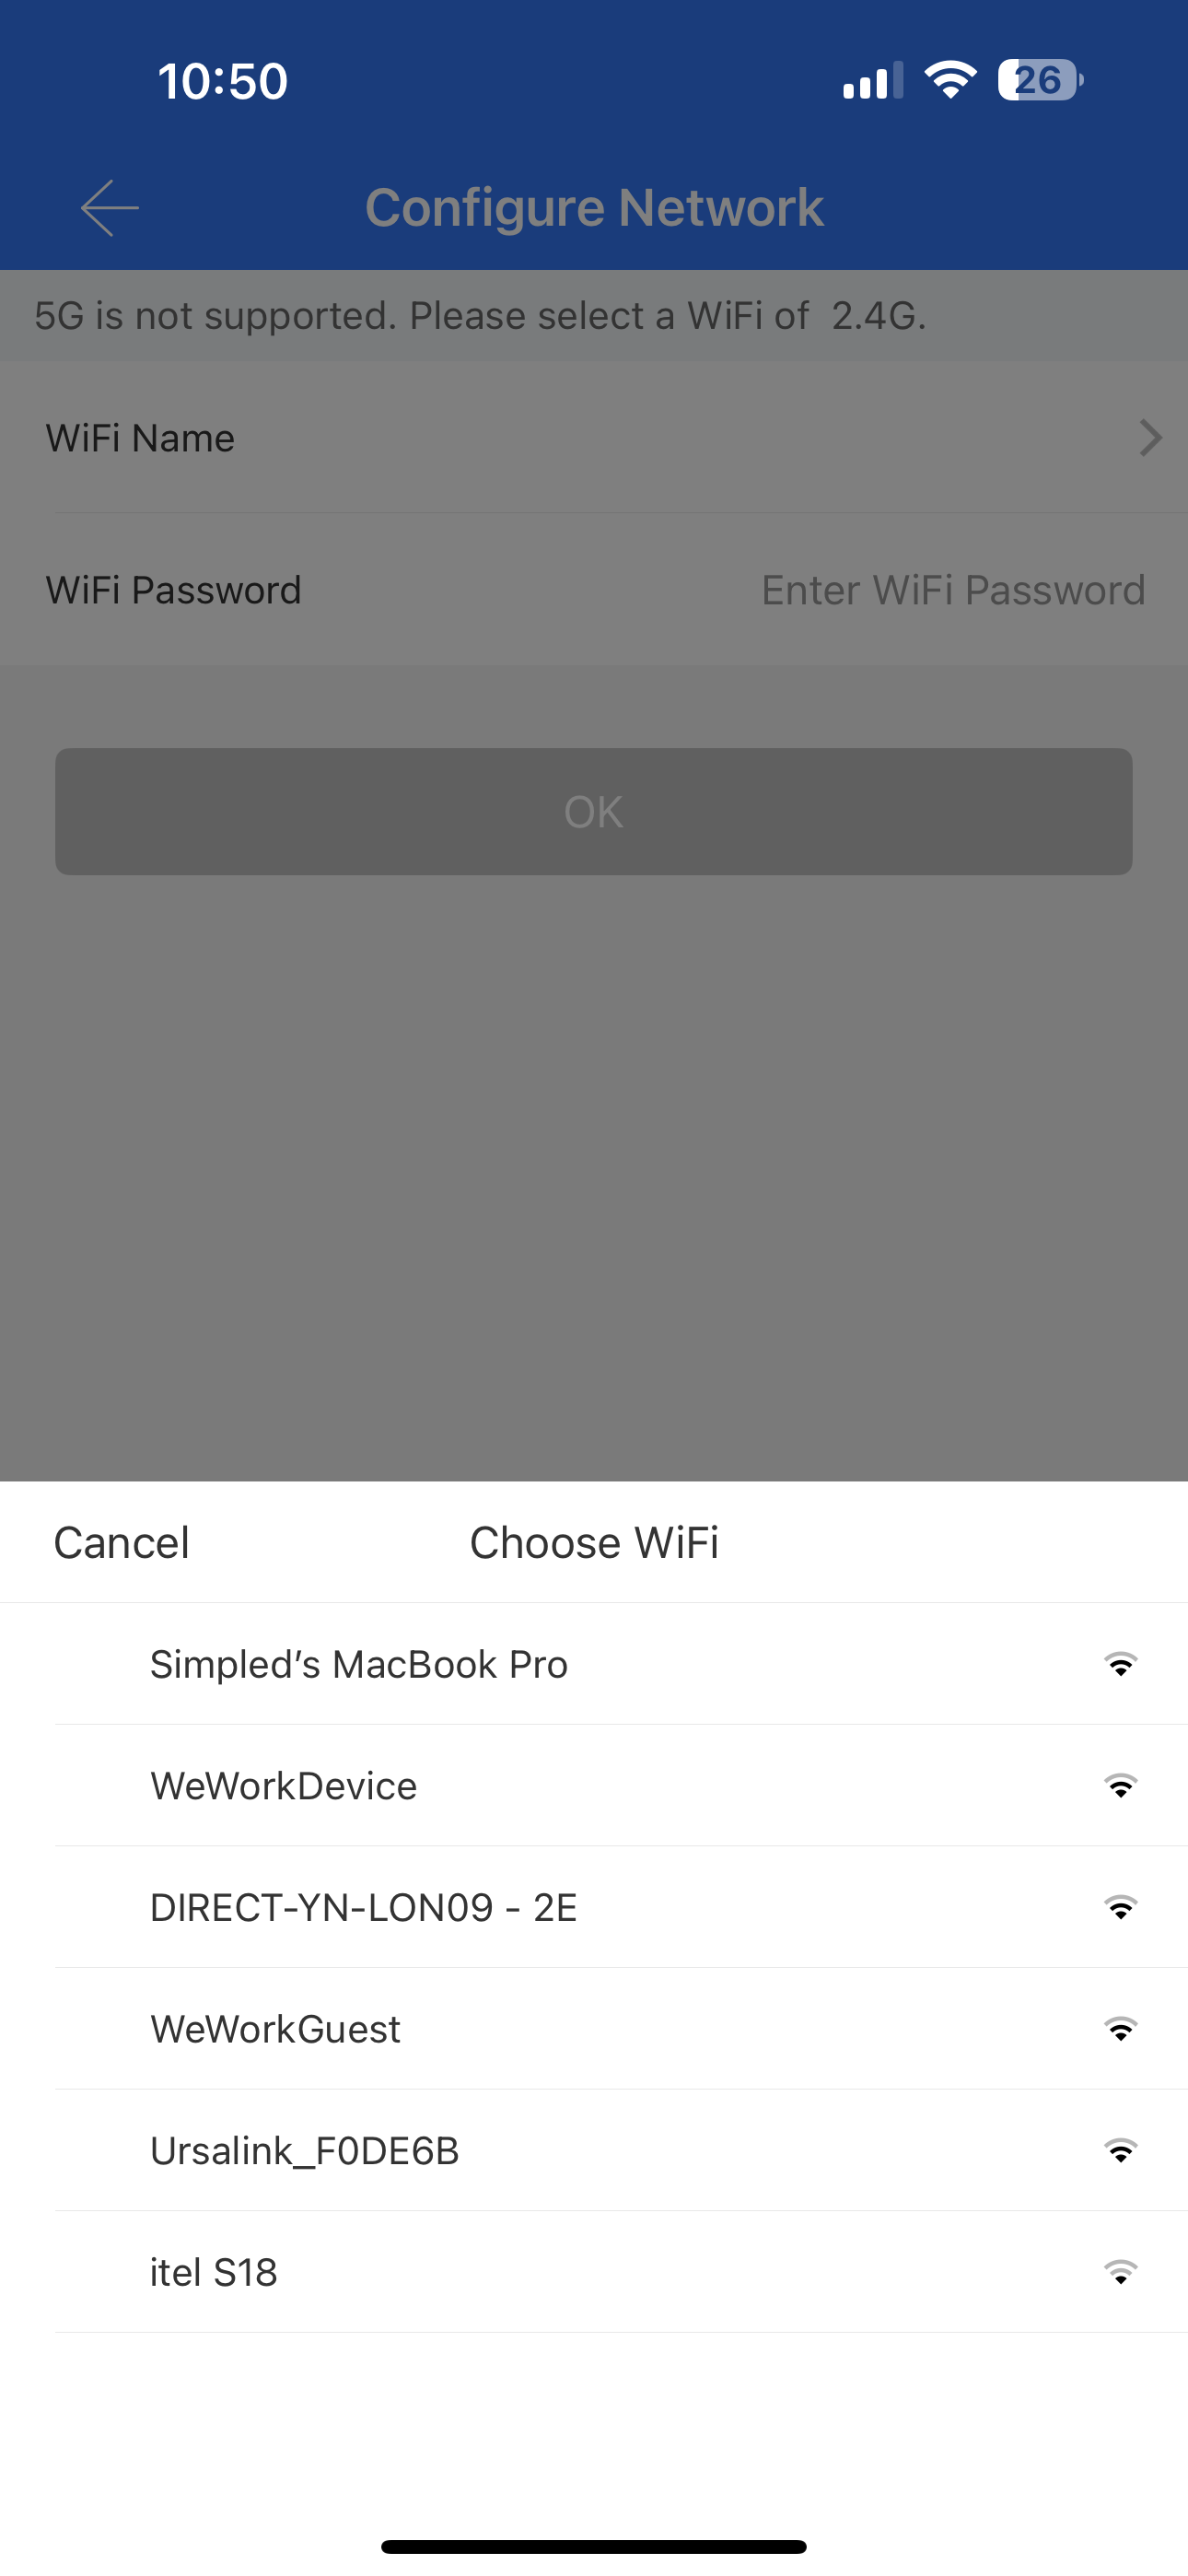
Connecting to Wi-Fi
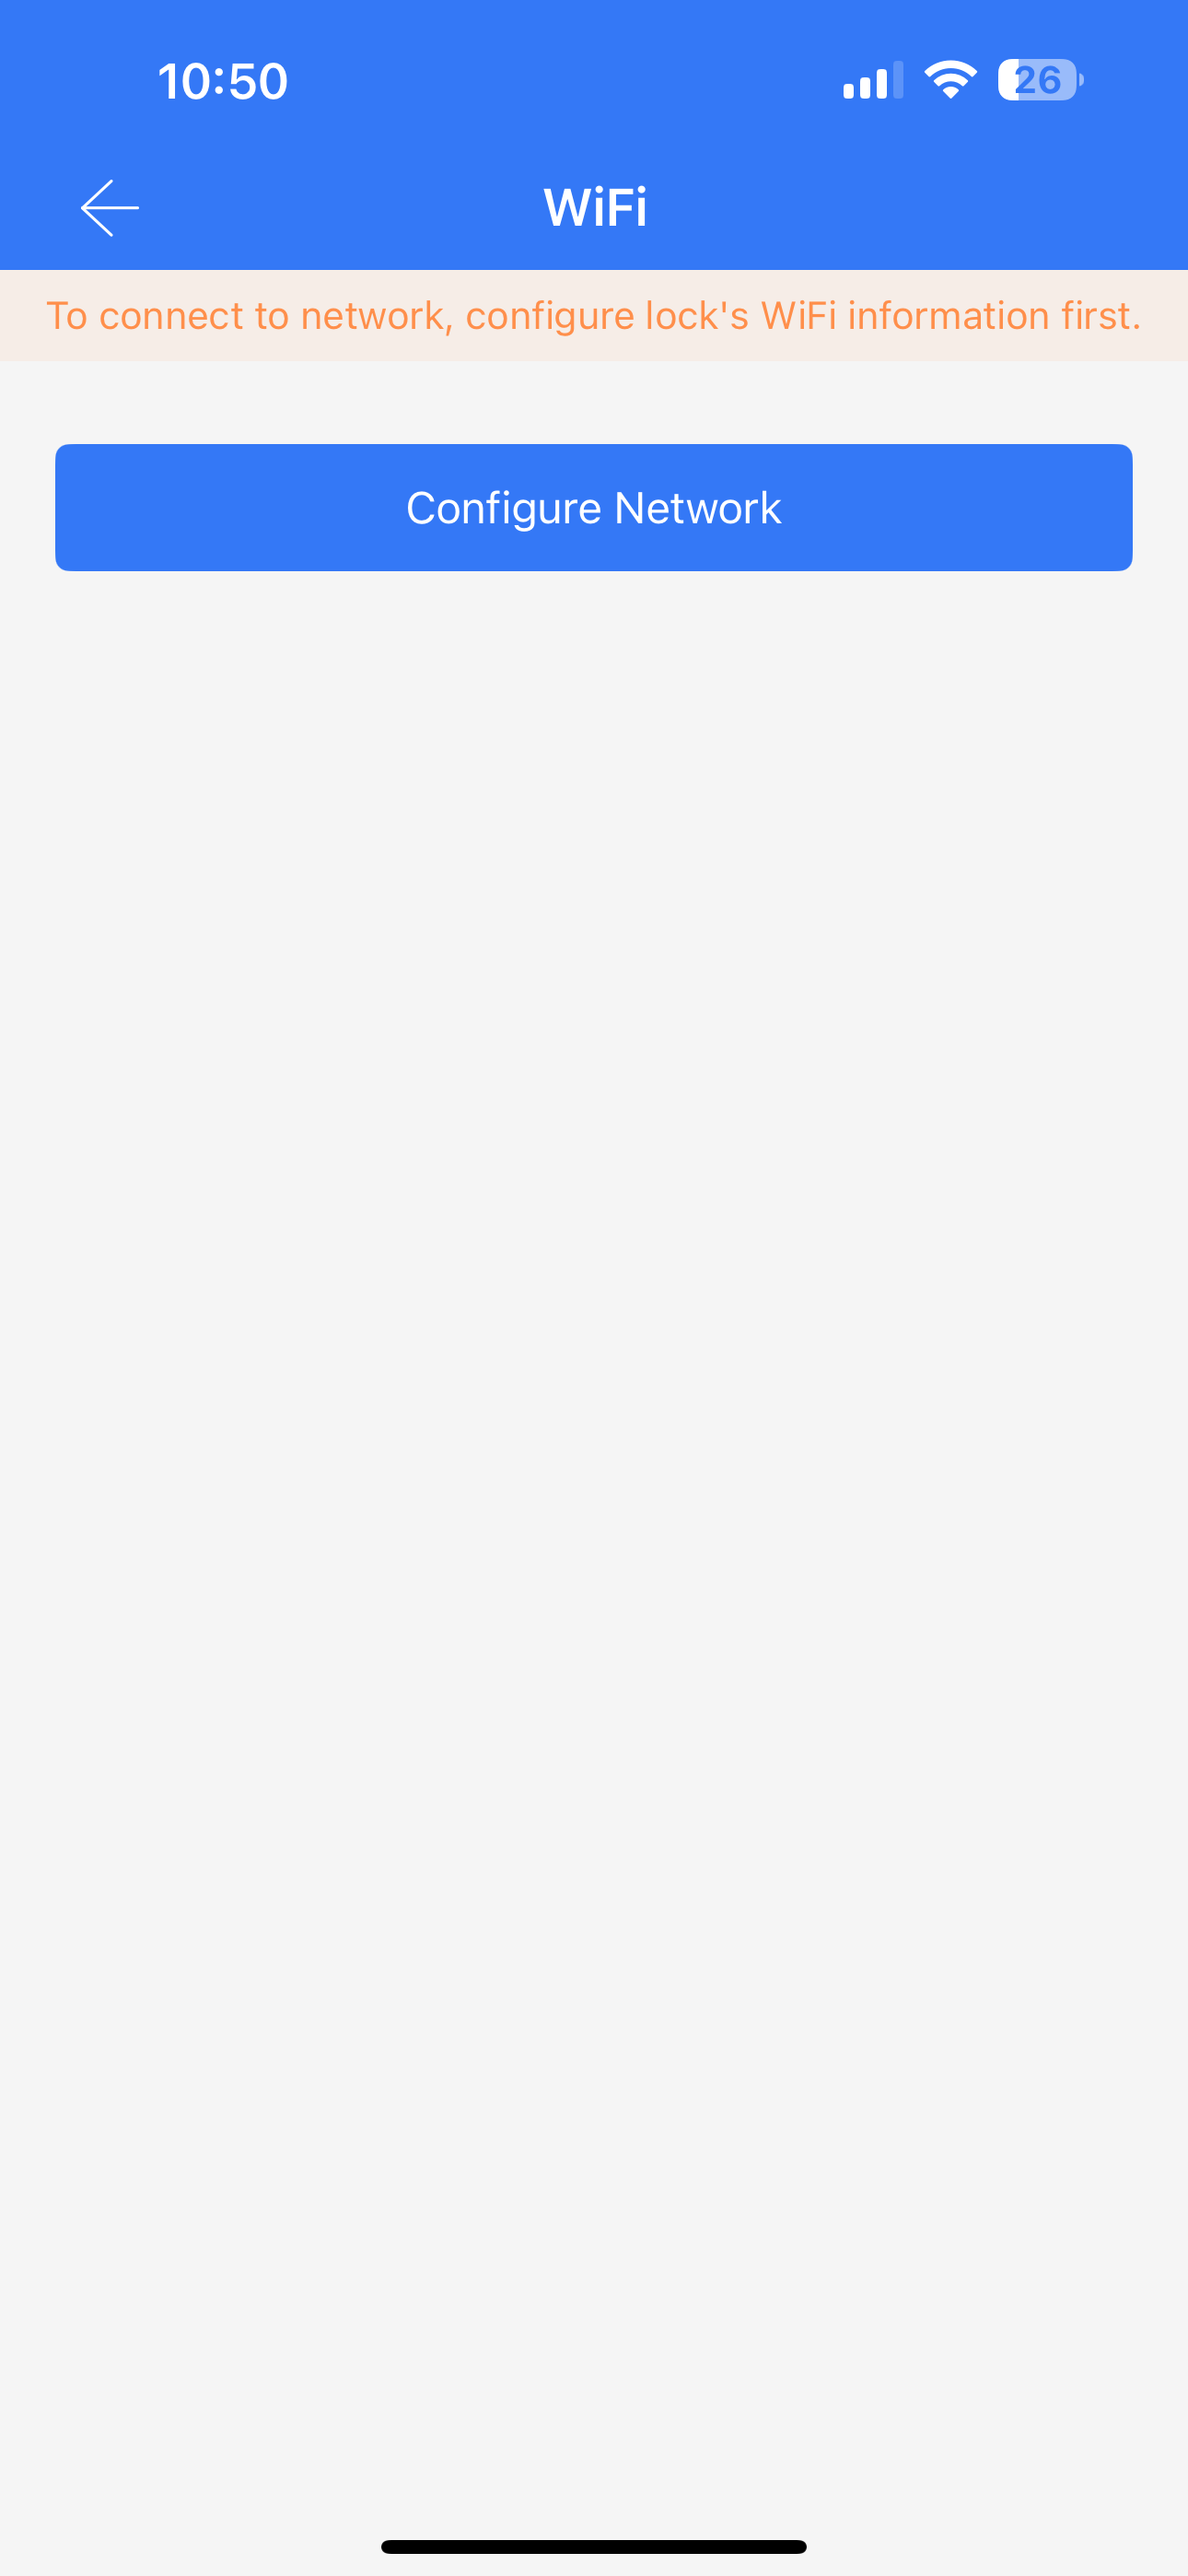
After pairing the lock, you’ll automatically be taken to the Configure Network page. If you skip it, you can access it manually by following the steps below:
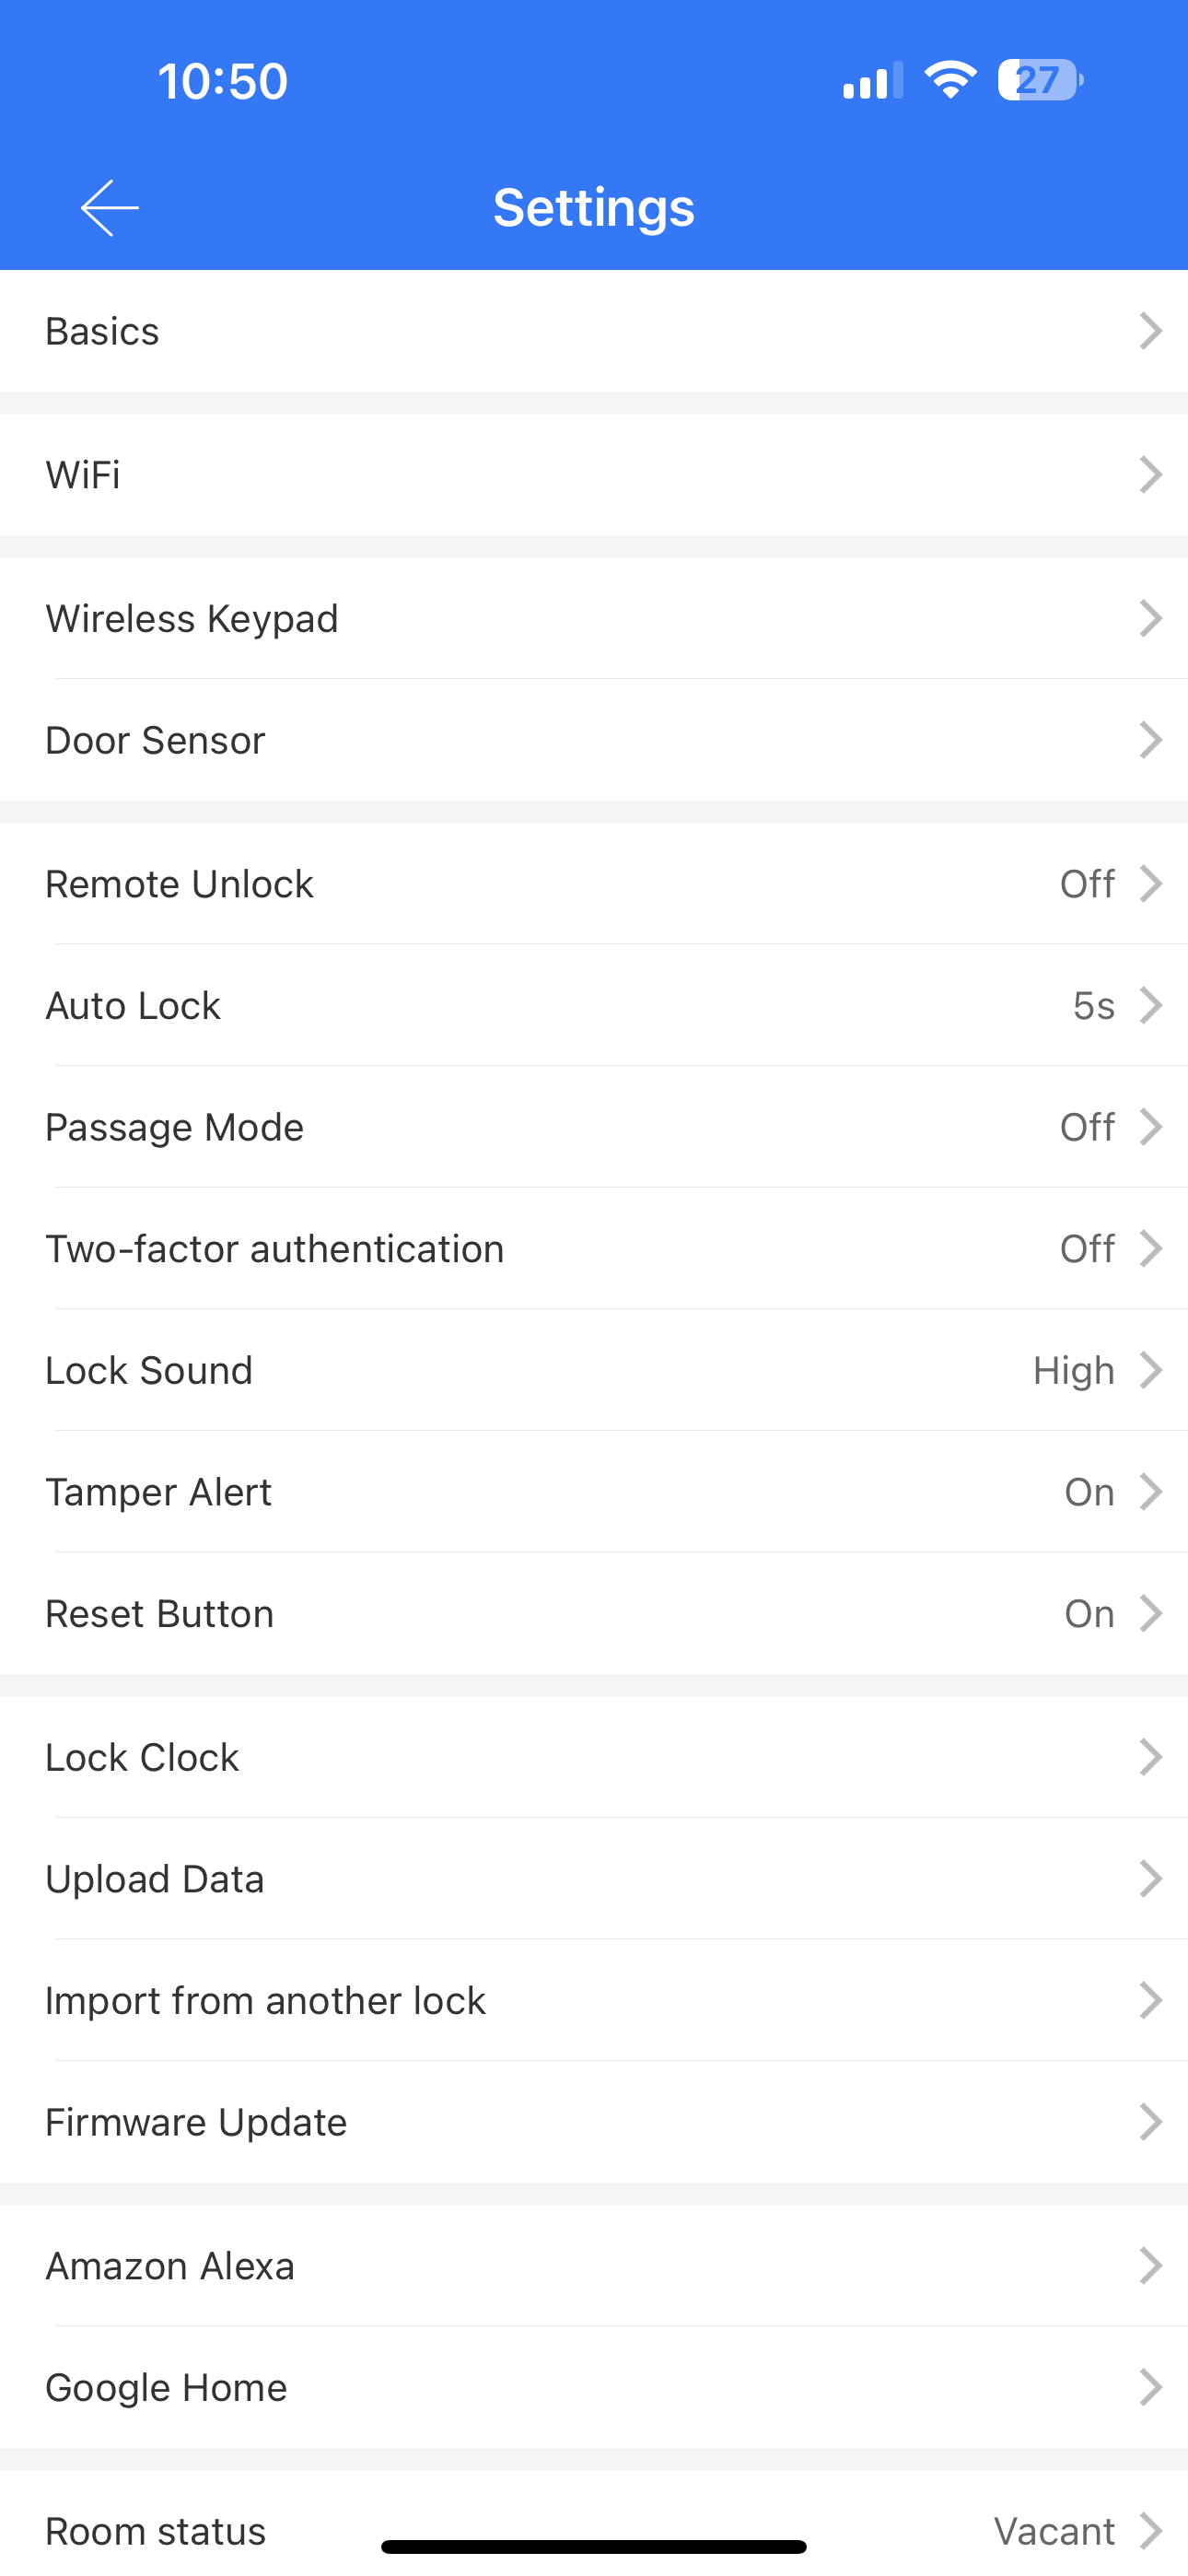
1. Open the Settings menu on the locks dashboard.
2. Tap on Wi-Fi.
3. Select Configure Network.
4. Choose a Wi-Fi network from the list.
5. Enter the network password and confirm.
Tip
Note: Only 2.4GHz networks are supported. 5GHz networks are not compatible.
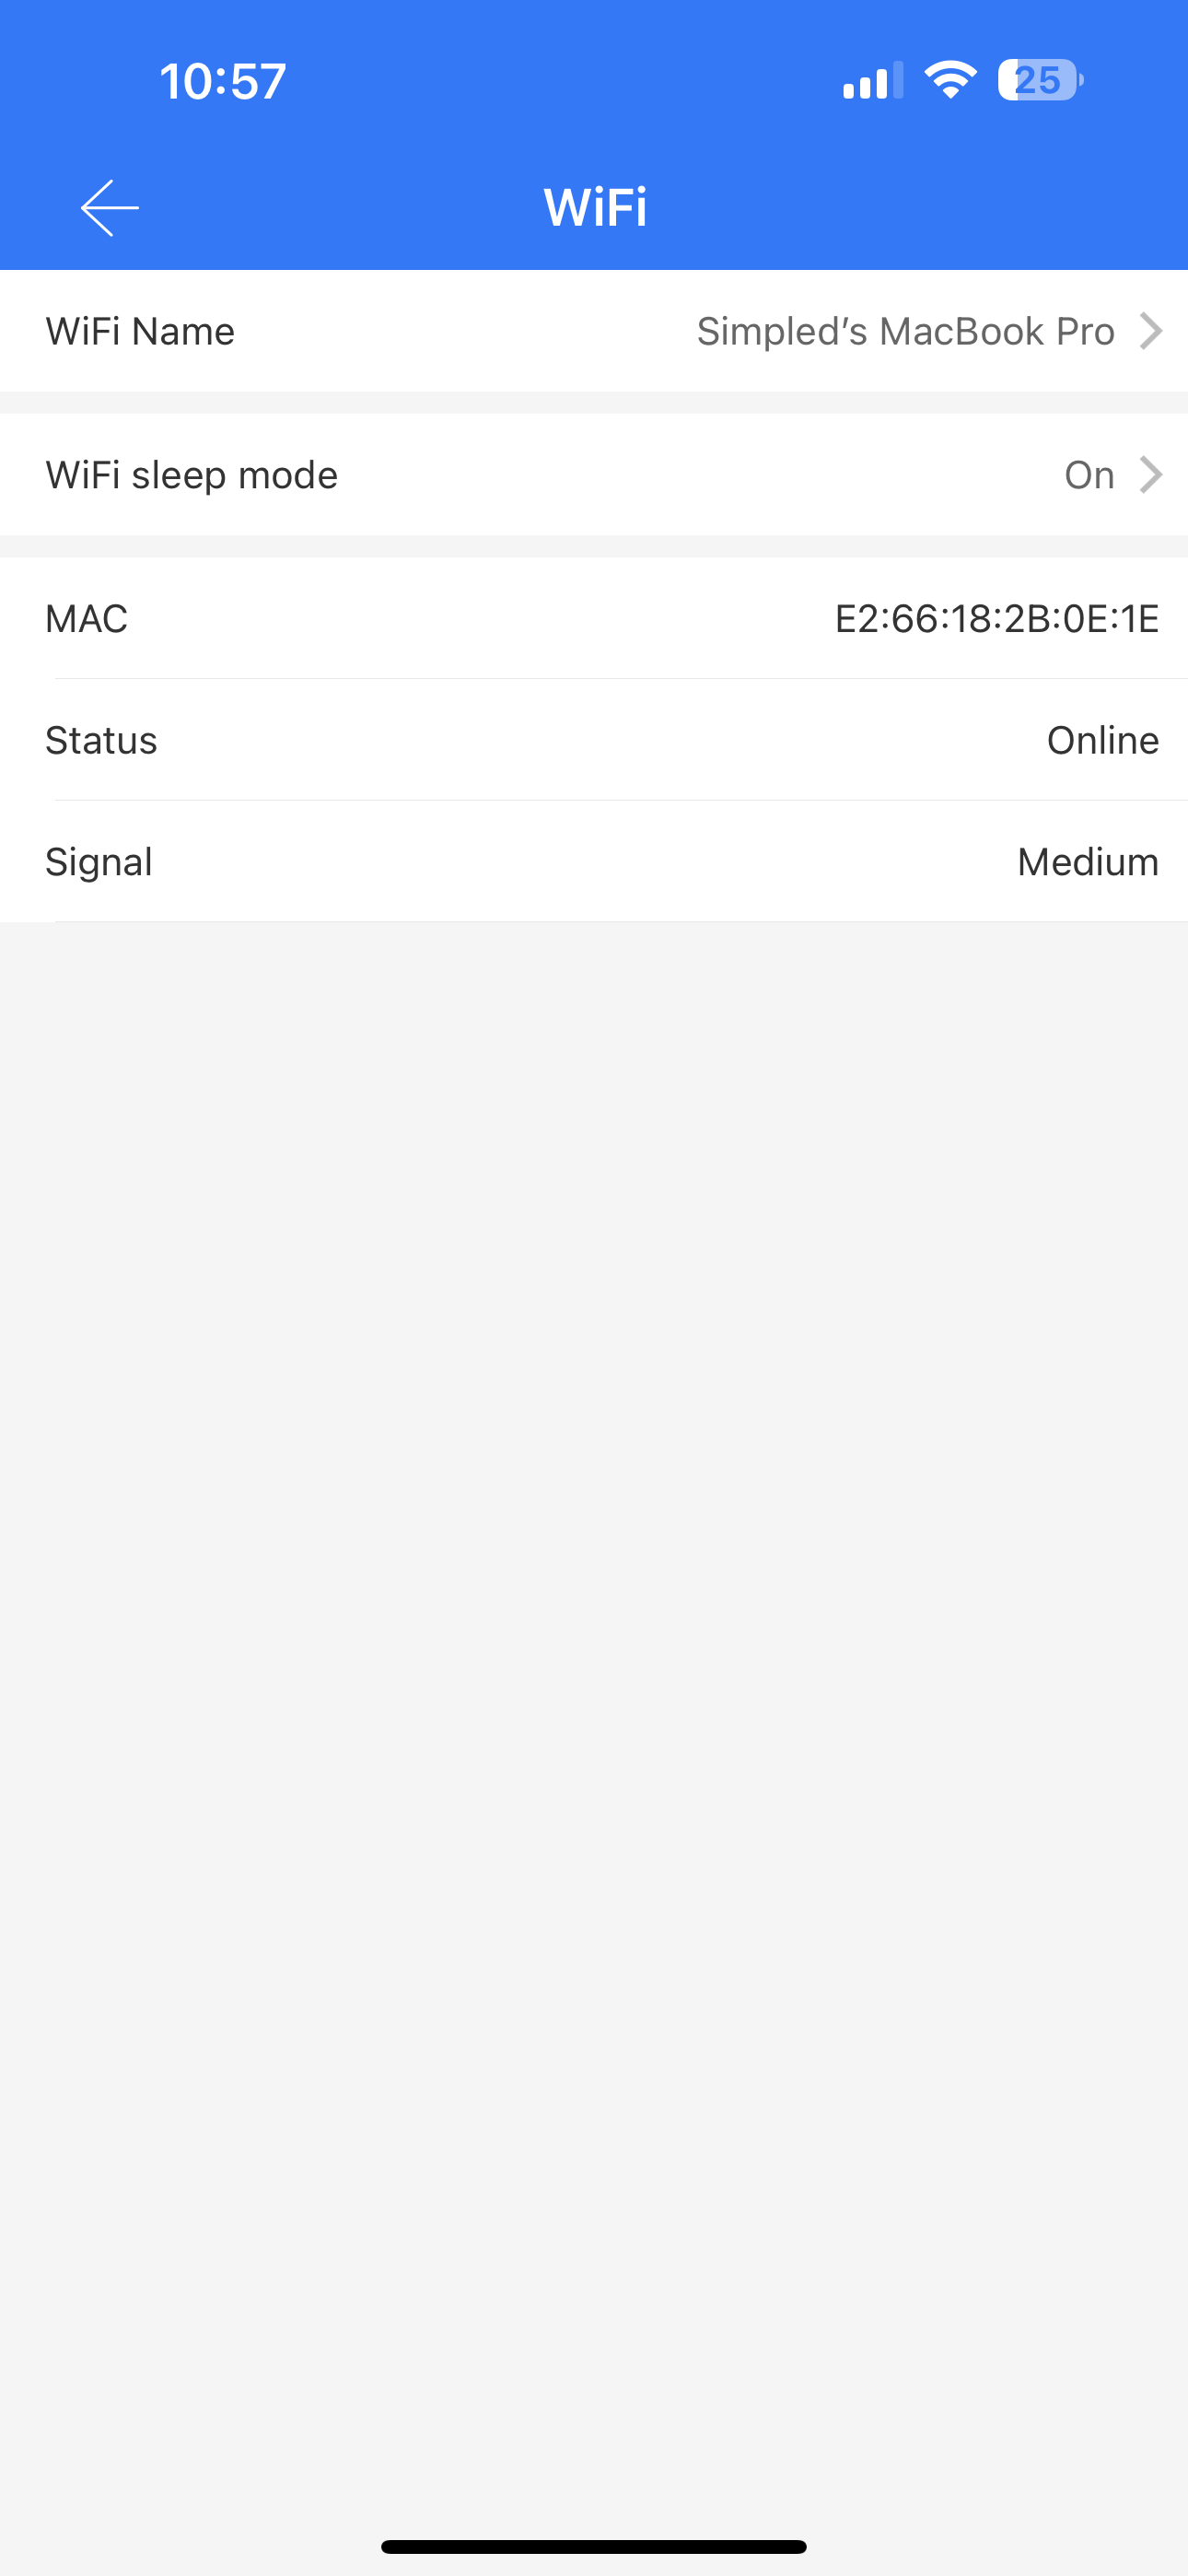
2. Wi-Fi Sleep Mode (Power Saving Mode)
Wi-Fi Sleep Mode allows you to control how often the lock stays connected to Wi-Fi, helping to manage battery life based on your usage.
•When Sleep Mode is OFF
The Wi-Fi connection remains active at all times. This ensures you can access full remote features such as unlocking and real-time management.
However, this setting significantly increases battery consumption and is recommended only if constant remote access is essential.
•When Sleep Mode is ON
The lock will disconnect from Wi-Fi according to the schedule you’ve set, helping preserve battery life. This is ideal if you don’t need 24/7 remote access and prefer to wake or sync the lock only when required.
When Sleep mode toggled on for the first time, by default, it is set to be active all day, every day. This means the lock will stay disconnected from Wi-Fi at all times, unless you manually adjust this time frame.
Custom Wi-Fi Wake-Up Schedule
If you’d like your lock to stay connected during certain hours — for example, in the morning or evening — you can reduce the sleep period by editing the schedule. This allows you to create short windows when the lock wakes up, connects to Wi-Fi, and syncs with your app.
Tip
Use Cases:
•Enable Sleep Mode overnight to conserve battery.
•Schedule the lock to connect to the internet once or twice a day – for example, in the morning and evening – to ensure any new access codes or settings are properly synced.
Waking the Lock in Sleep Mode
When the lock is in Sleep Mode (offline), pressing any button on the keypad will wake it up. The lock will then attempt to connect to the configured Wi-Fi network to sync data or process any pending updates.
Note: Connection time may vary depending on your Wi-Fi signal strength.
App Status Display
Once the lock wakes and connects:
The app will show the lock as “Online”, and this status will remain visible for approximately 10 minutes.
In reality, the lock stays connected for only a few seconds to complete the sync, then returns to sleep mode (offline).
Tip
Please be aware that the “Online” status in the app may not immediately reflect the actual state of the lock. It can take up to 10 minutes for the status to update back to “Offline”.
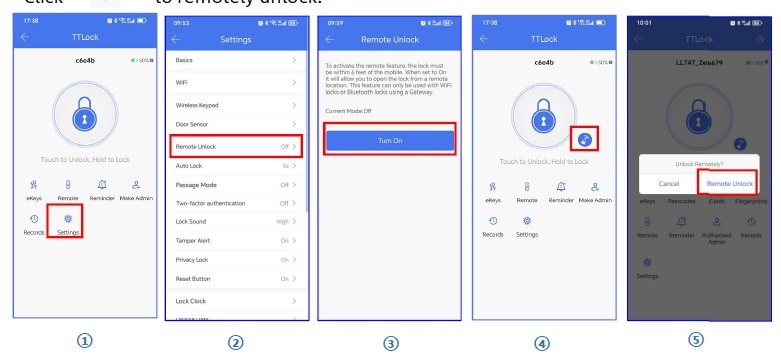
Enabling Remote Unlock
To enable the remote unlocking feature:
1. Go to Settings.
2. Tap on Remote Unlock.
3. Toggle the switch to ON.
Once enabled, a “

www
Important: For remote unlocking to work instantly and reliably, Wi-Fi Sleep Mode must be turned OFF. This keeps the lock online and ready to receive commands from your phone at any time.
remote
4. Resetting Wi-Fi Settings
If you need to change the network or reconnect:
Open the Settings menu.
Tap on Wi-Fi.
Select Your WiFi under the WiFi Name.
Choose your preferred 2.4GHz Wi-Fi network and re-enter the password.
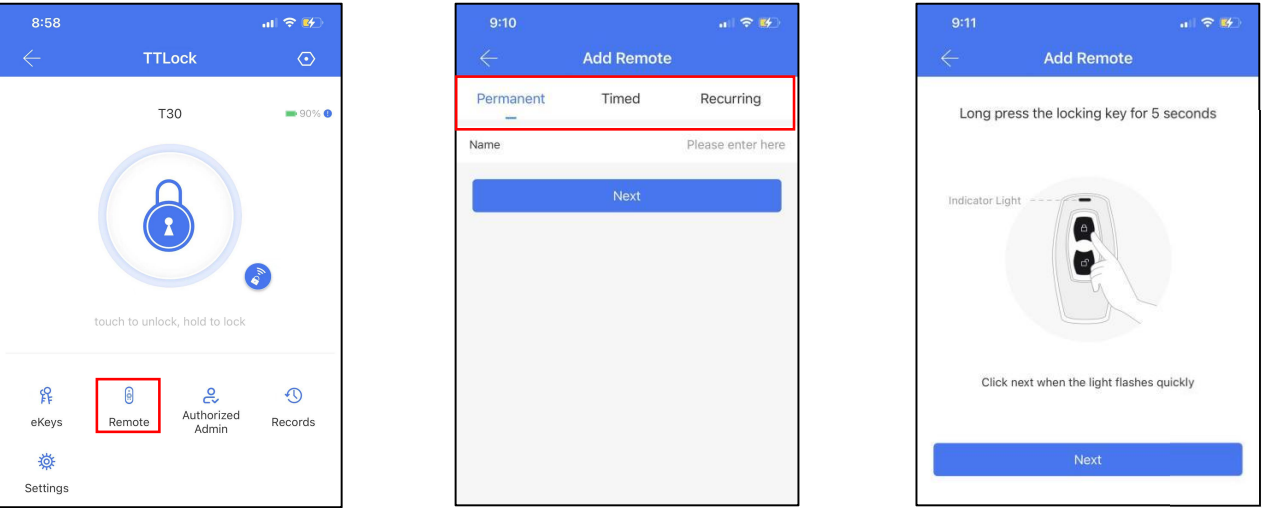
Add a remote controller:
This lock supports unlocking with a remote controller. Before using the remote, it needs to be added first. You need to perform the adding process while you are near the lock. The validity period of the remote can be set, it can be permanent or timed.
Create and send eKeys:
Click on the "eKeys" option as shown in picture. You can send the eKey to other users of TTlock to authorize the unlock (the receiver must download the APP and set up an account)
→ Select e-key format (Timed, permanent, One-time, Recurring)
→Enter recipient's TTlock account and set the name and the effective time of the eKey.
You can choose to enable or disable the remote unlocking or allow them to set authorized administrator or not authorized.
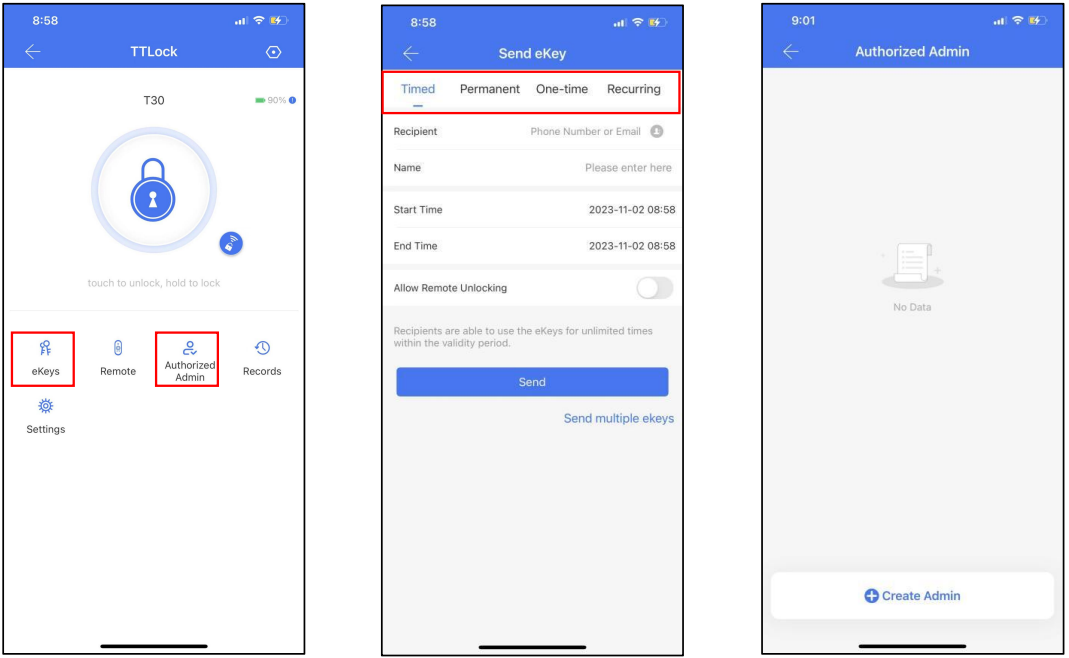
Create Admin:
With this feature, you can assign a
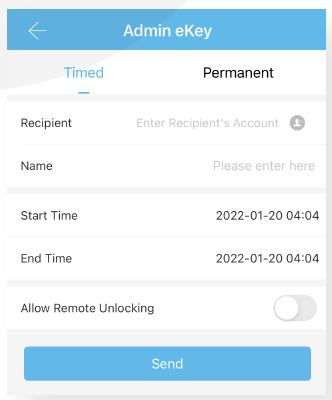
new timed/ permanent admin to
have the same level of access to
the lock.
For example, your receptionist or
even your guest will be able to add
new users and even register their
own fingerprint on the smart lock,
up to the time their users are valid.
**Transfer lock to a new owner:**1. Open the app

2. Tap on the more option icon on the top Left
3. Select “Settings”
4. Tap on “Transfer Lock(s)”
5. Select the lock(s) and press Next
6. Enter the new owner Account, and press Next.
Notice: The selected lock(s) will be permanently transferred.
FAQ:
1. Why can’t I open the door after the passage mode is enabled?
You need to unlock the door with any method for the passage mode to take effect.
What is the purpose of Auto Lock?
The auto-lock is a safety feature to relock the door a set number of second after you have unlocked it. The period is preset to five seconds but can be changed to any length you want in: Lock -> Settings -> Auto Lock.
Why do the batteries run down more rapidly than expected?
*It may be due to:*1. Standby power consumption keeping the bluetooth available over time
2. Occasionally heavy rain onto a fingerprint sensor can create lock activations which shorten the battery life
3. A short circuit (but this is much less likely)
Useful Information:
Built-in WiFi lock not syncing to server
Introducing the Simpled Motorised Cylinder
Functionality of Simpled Smart Locks Without Network Access